You can now operate at a different frequency supported by the JTAG cable, by setting
a custom JTAG frequency.
To set a custom JTAG frquency:
-
In the Target Connections view, click the Add Target
Connection button.
 . The Target Connection Details
dialog box opens.
. The Target Connection Details
dialog box opens.
-
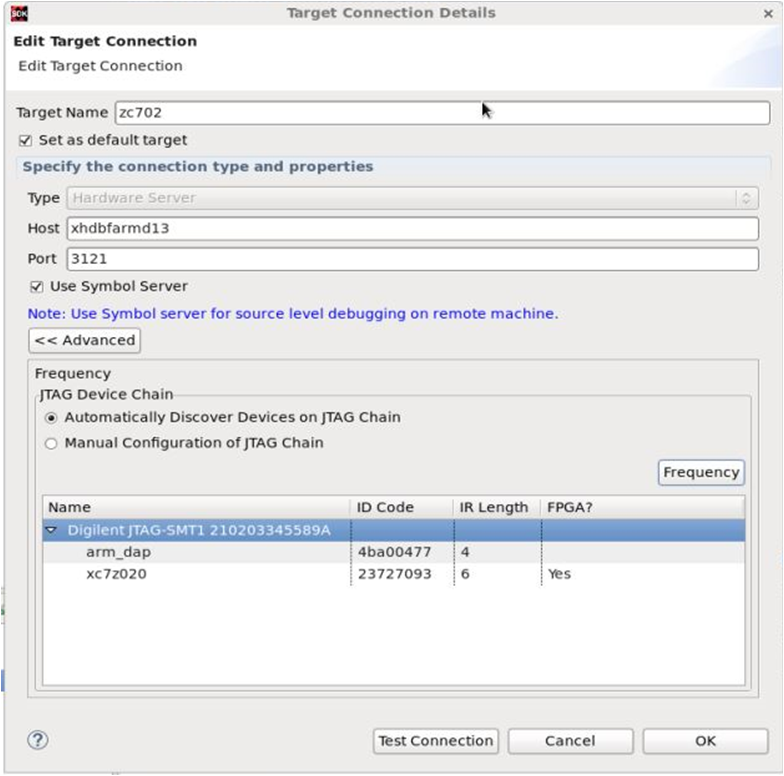
Specify the name of the new remote target connection, for example
test.
- Check the Set as default target checkbox to set this target as default. SDK uses the
default target for all the future interactions with the board.
-
Specify the name or IP address of the remote host machine. This is the machine
that is connected to the target and hw_server is running.
-
Specify the port number on which the hw_server is running. By default,
hw_server runs on port 3121. Select Use Symbol Server, if
the hardware server is running on a remote host.
-
Click Advanced to view the JTAG device chain details.
-
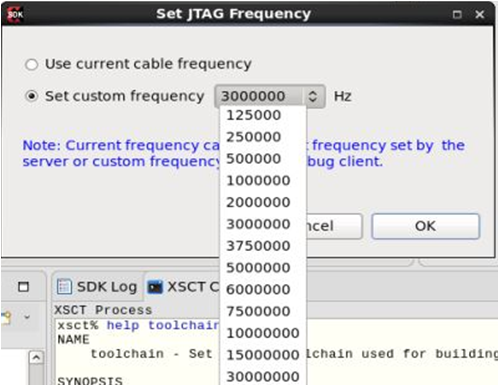
Select the JTAG device chain and click Frequency to
open the Set JTAG Frequency dialog box.
-
From the Set custom frequency drop-down list, select the
frequency.
Note: Current frequency can be the default frequency set by the server or the
custom frequency set by a debug client.
-
Click OK to save the configuration and close the
Set JTAG Frequency dialog box. The selected frequency
is saved in the workspace and is used to set the frequency before executing a
connect command for the selected device.
-
Click OK to create a new target connection.
Note:
If only one client is connected to the server, the frequency of the cable
will be reset to the default value whenever the connection is closed.
However, in case of multiple clients connected to the server, it is not
recommended to perform simultaneous debug operations from different
clients.